Shower Valve Swap Done Right - Old Moen Out, New Delta In
A lot of bathroom updates stay surface-level. New paint, maybe a vanity swap. But when the plumbing behind the wall is outdated or starting to fail, you're only putting a bandage on a bigger problem. That's exactly the situation we were working with here - an old Moen shower valve that needed to go.
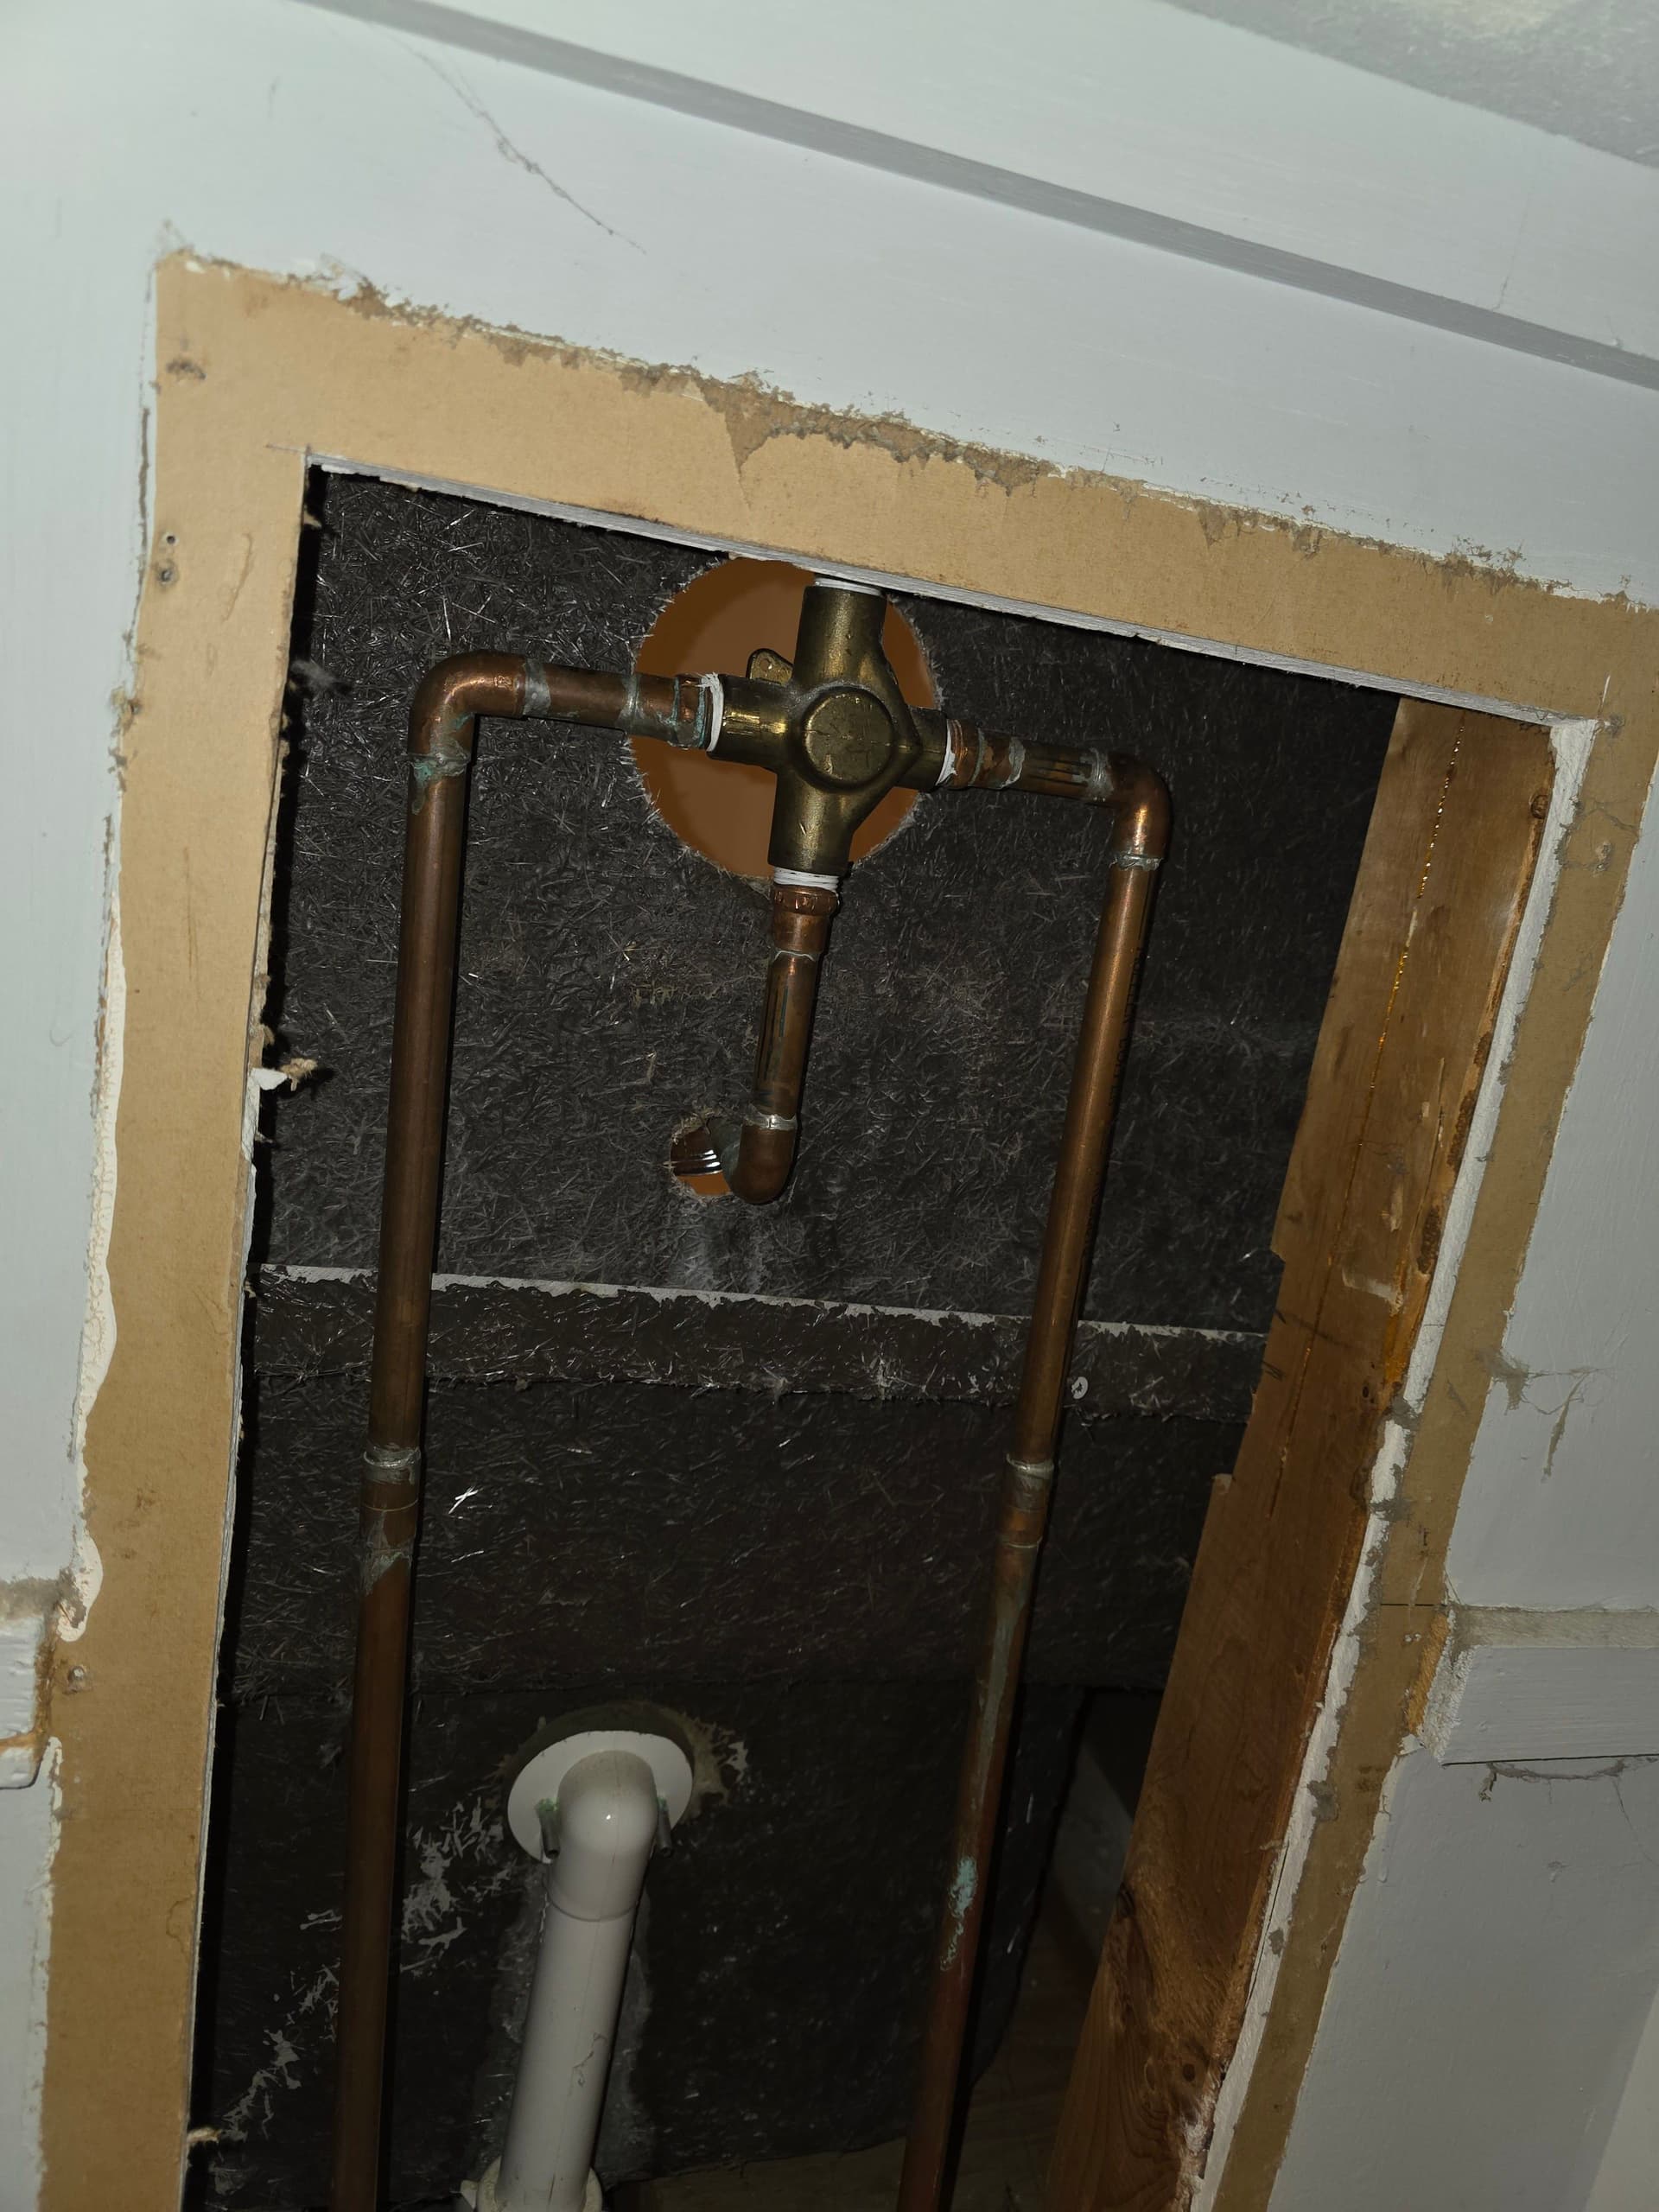
Here's what we were working with: existing copper supply lines, the original Moen valve sitting inside the wall cavity, and a setup that had been there long enough. We opened up the access panel to get a clear look at everything before touching a single connection. That's how you avoid surprises. The before shot shows the old valve in place - you can see the aged brass and copper, doing its job but past its prime.
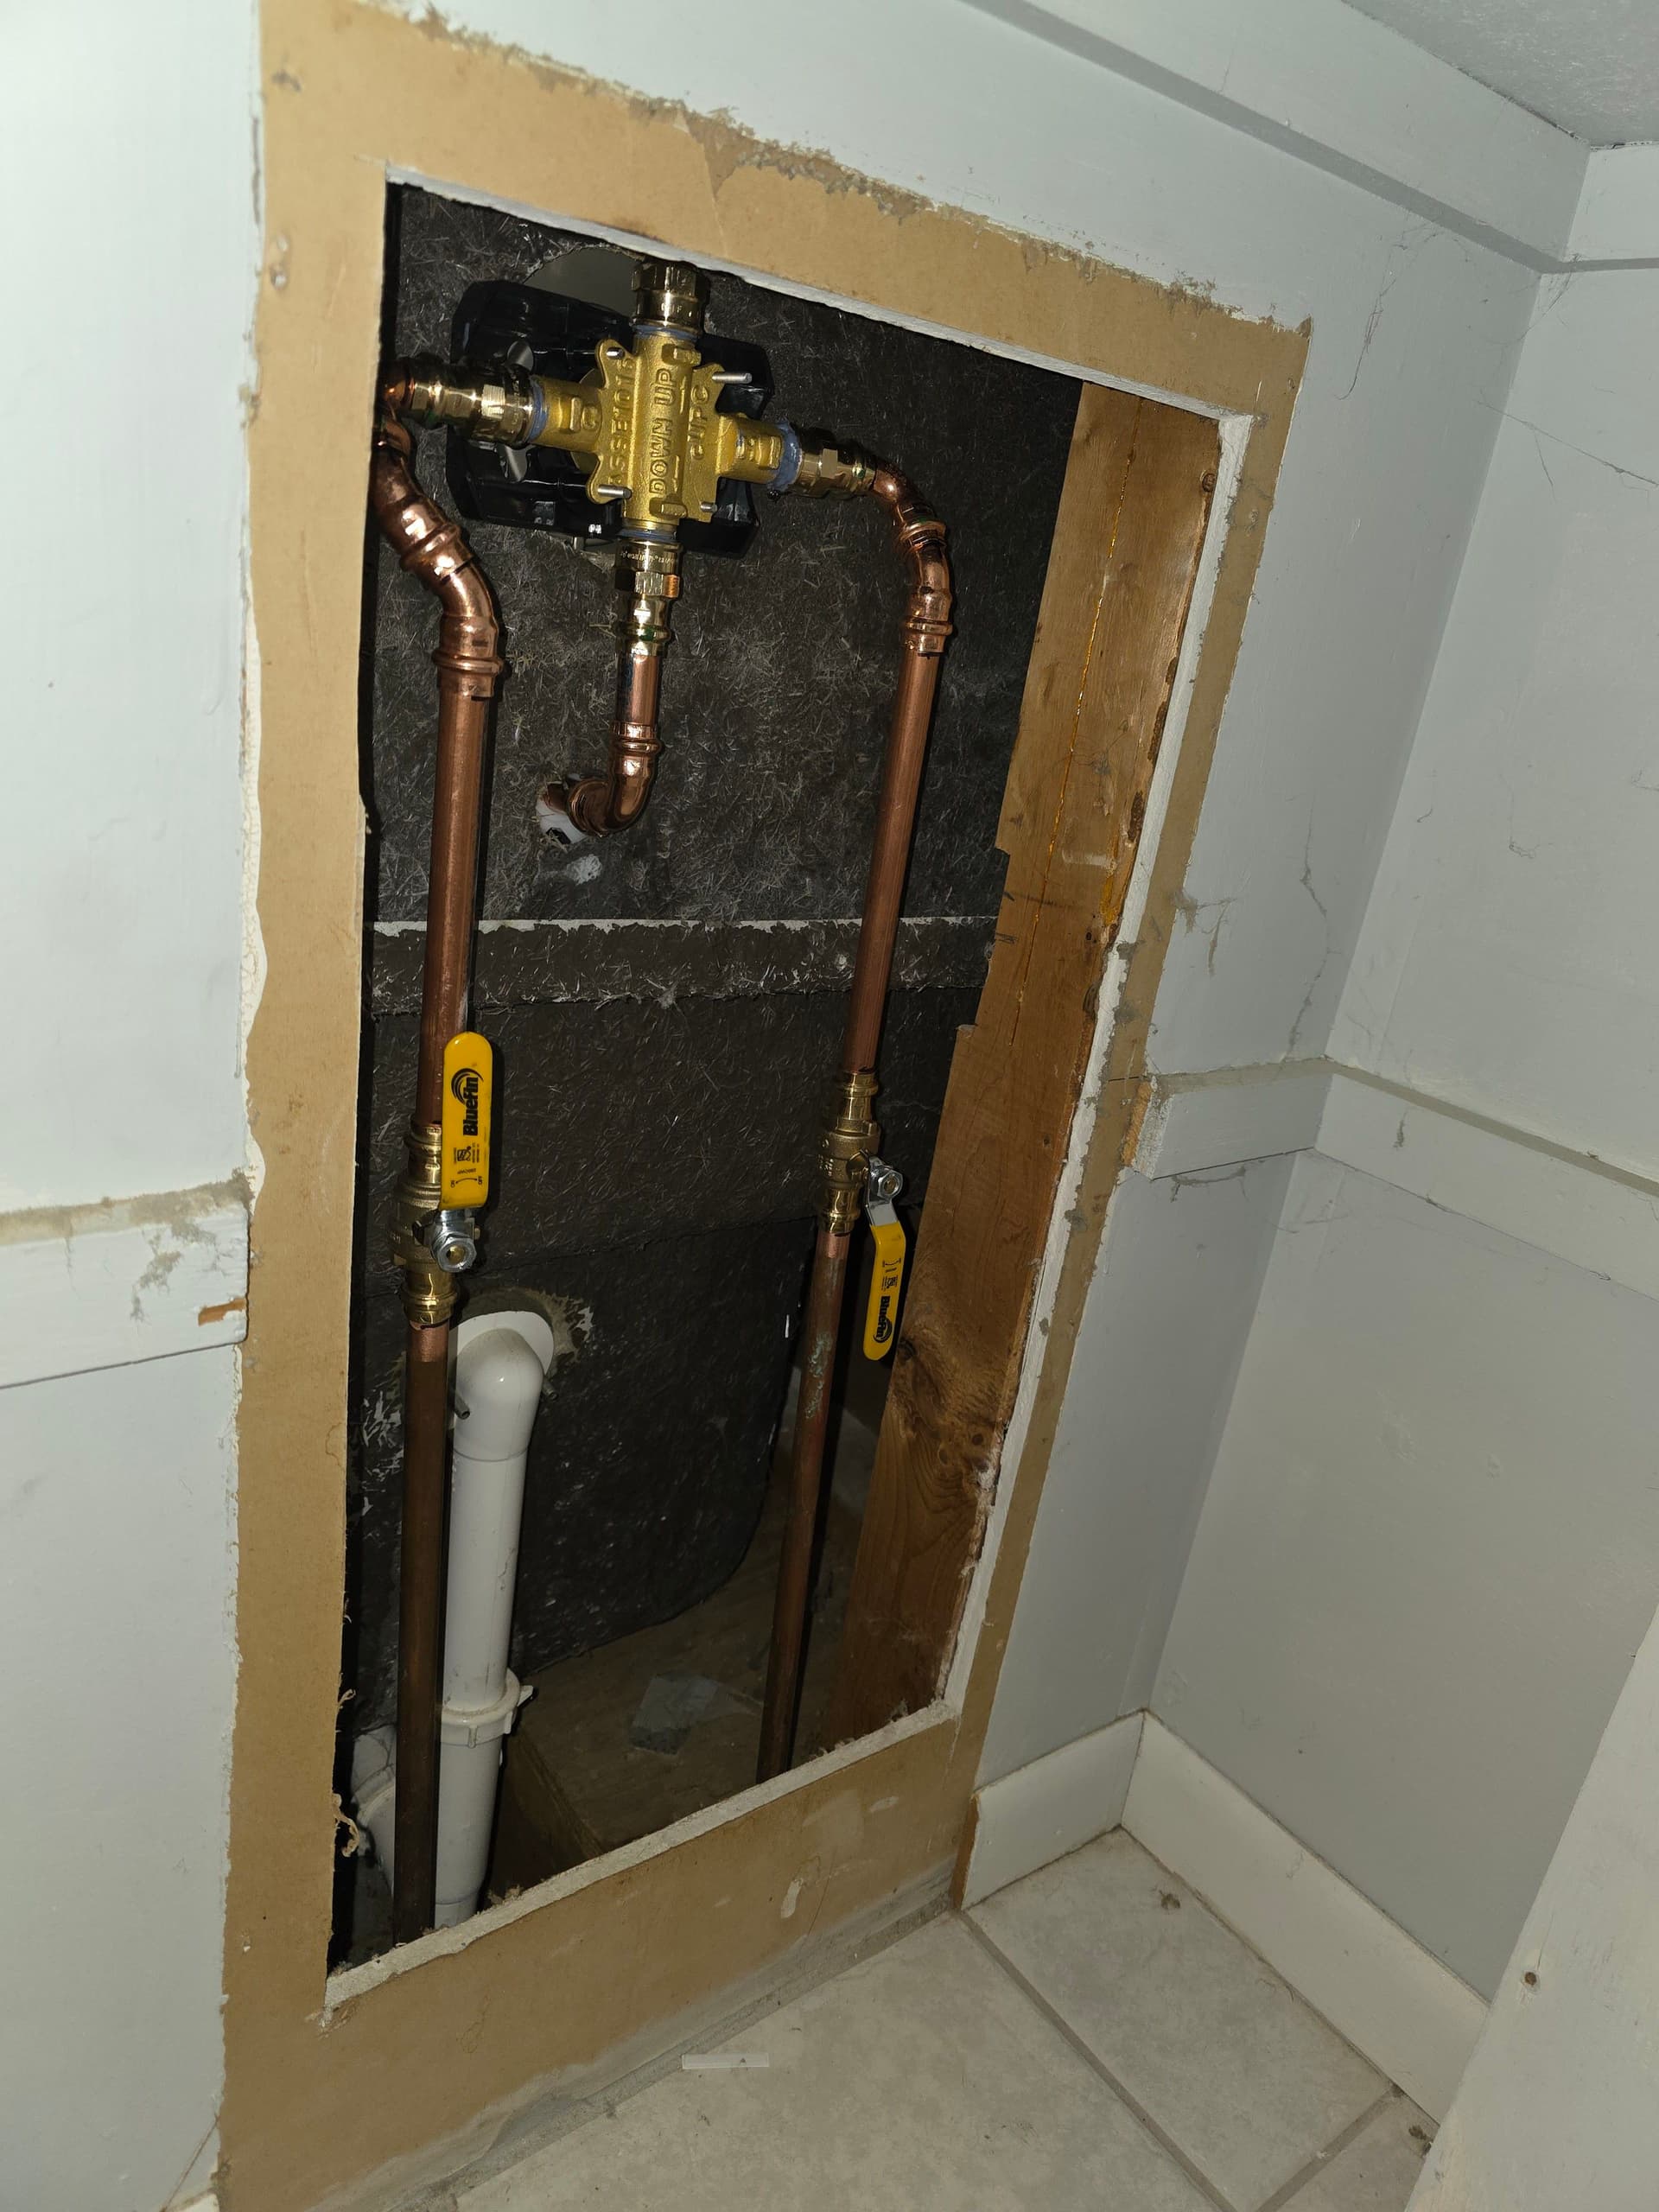
We pulled the old Moen valve and replaced it with a new Delta unit, reconnecting to the existing copper lines cleanly. Shut-off valves were added on both the hot and cold supply lines right at the wall - something that makes future service work a whole lot easier. No hacking into the wall again just to turn off the water. That's the kind of detail that matters on a plumbing installation like this.
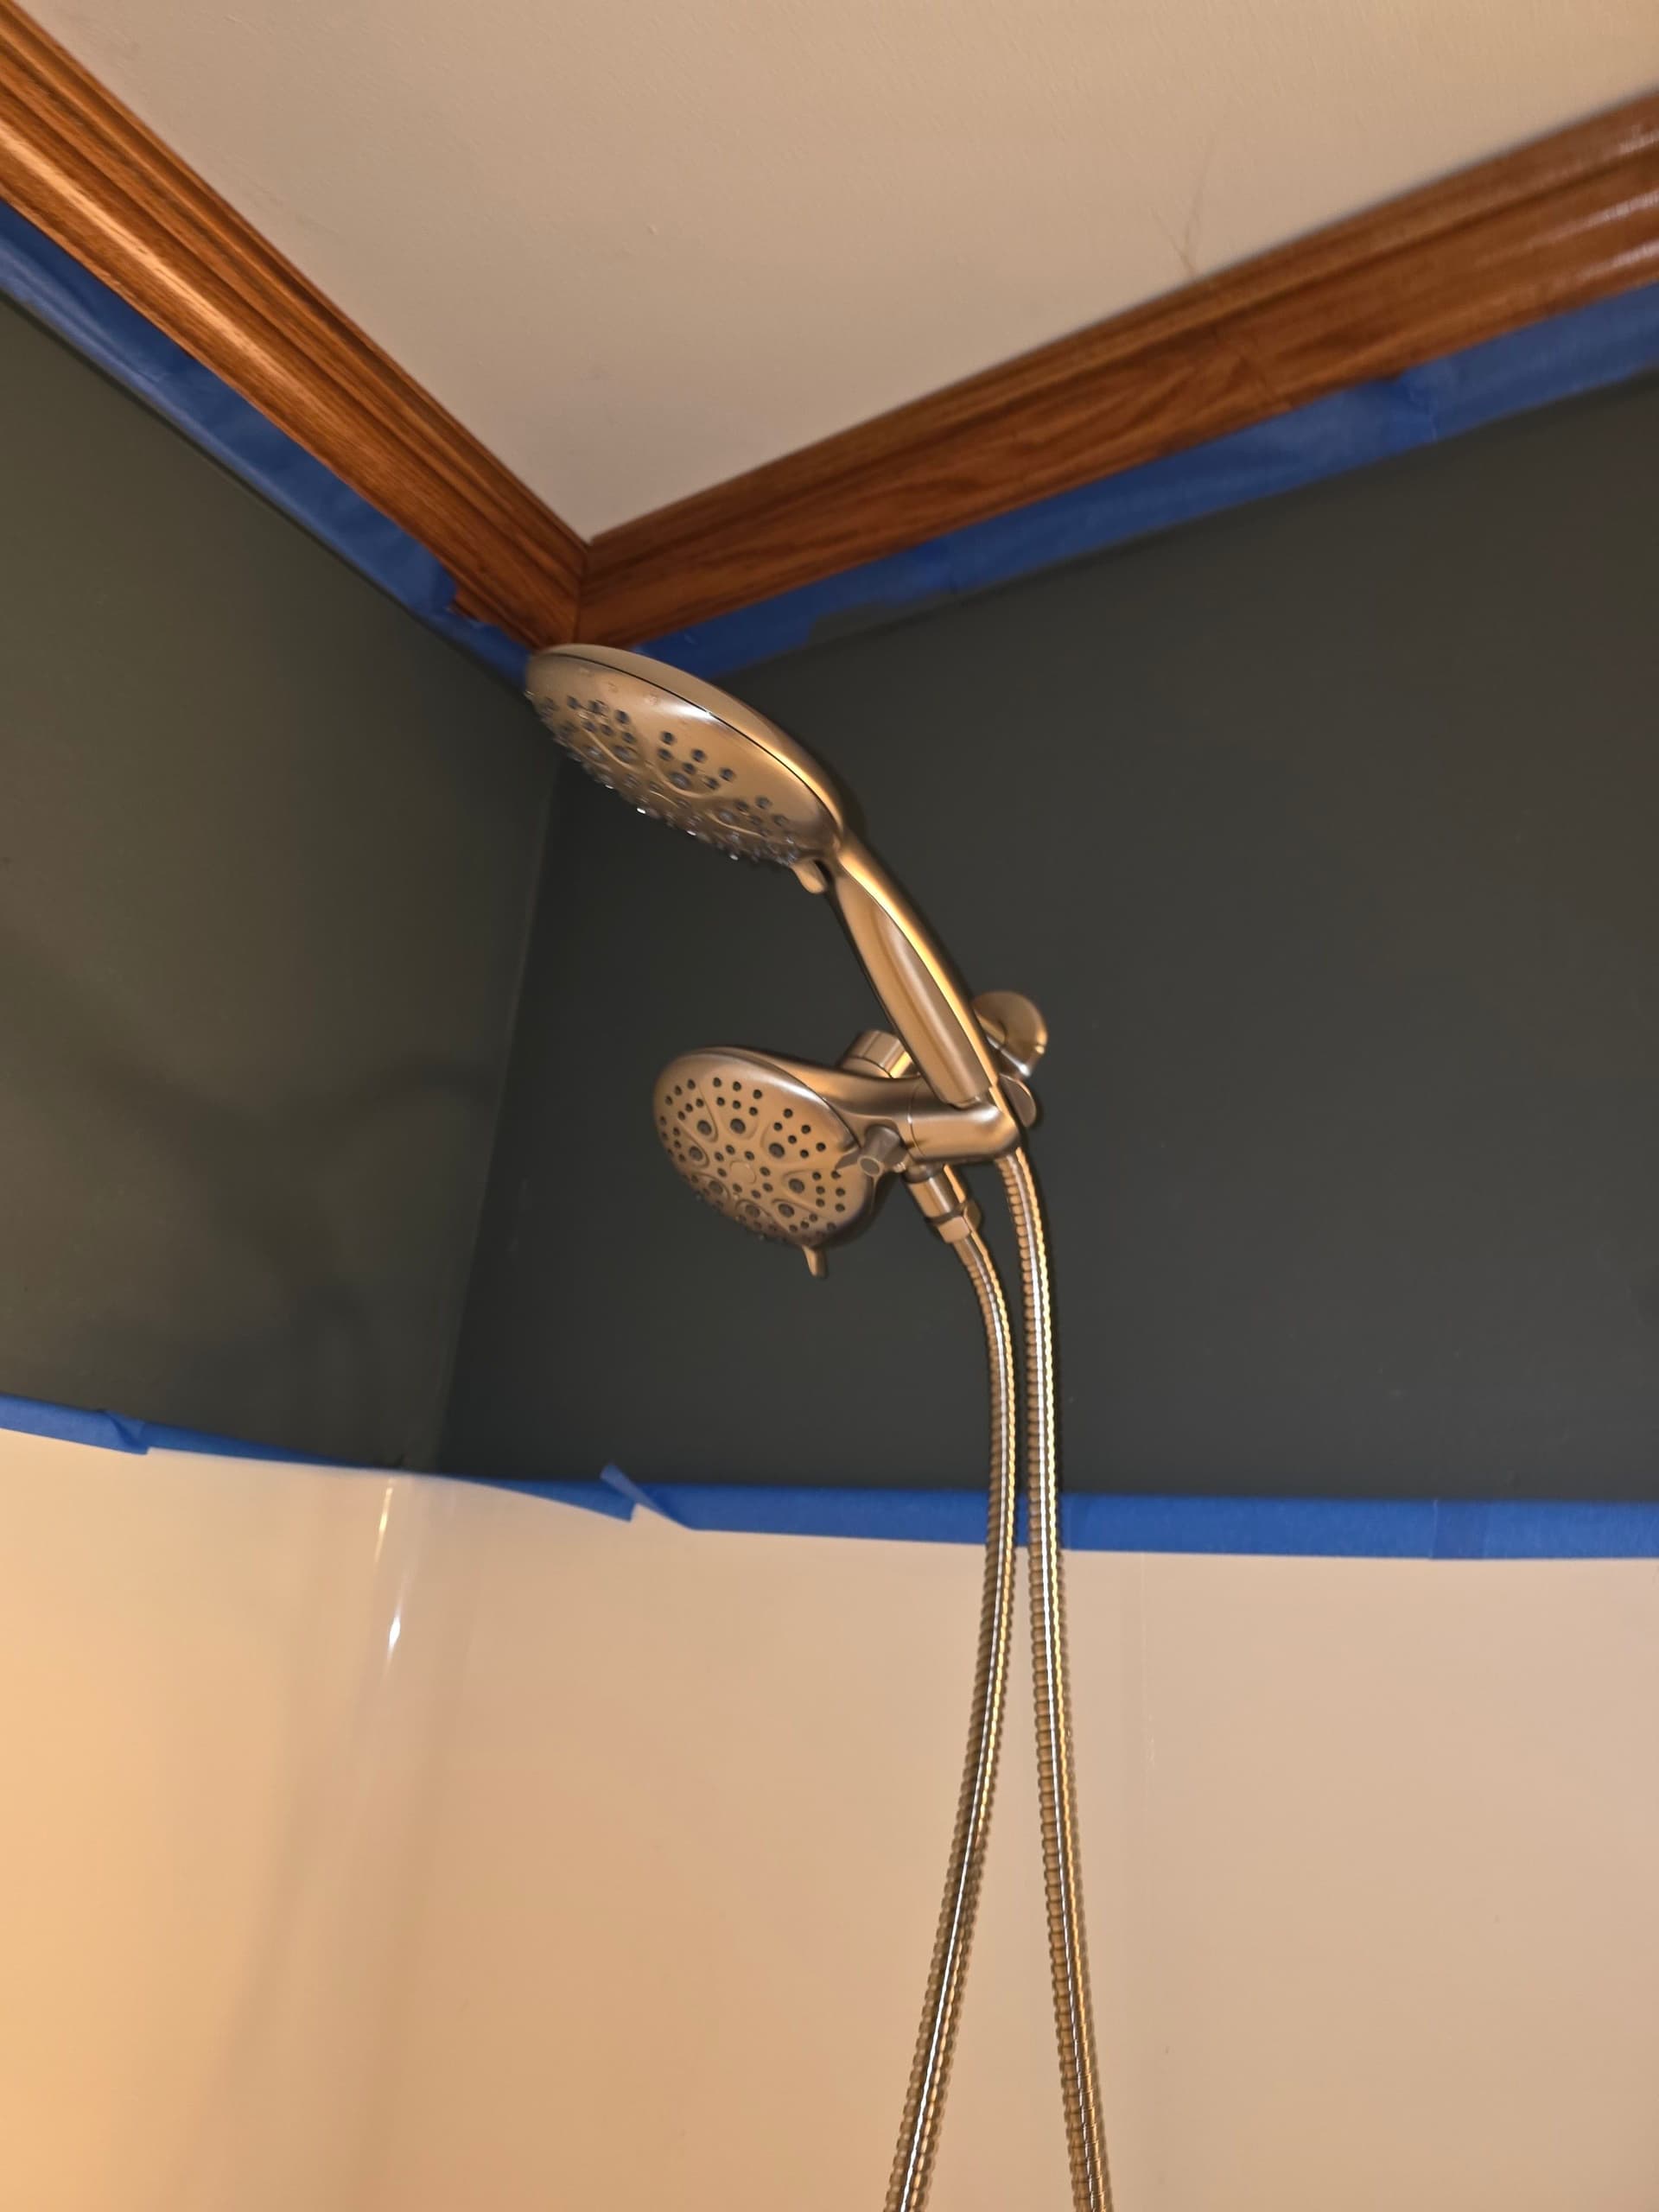
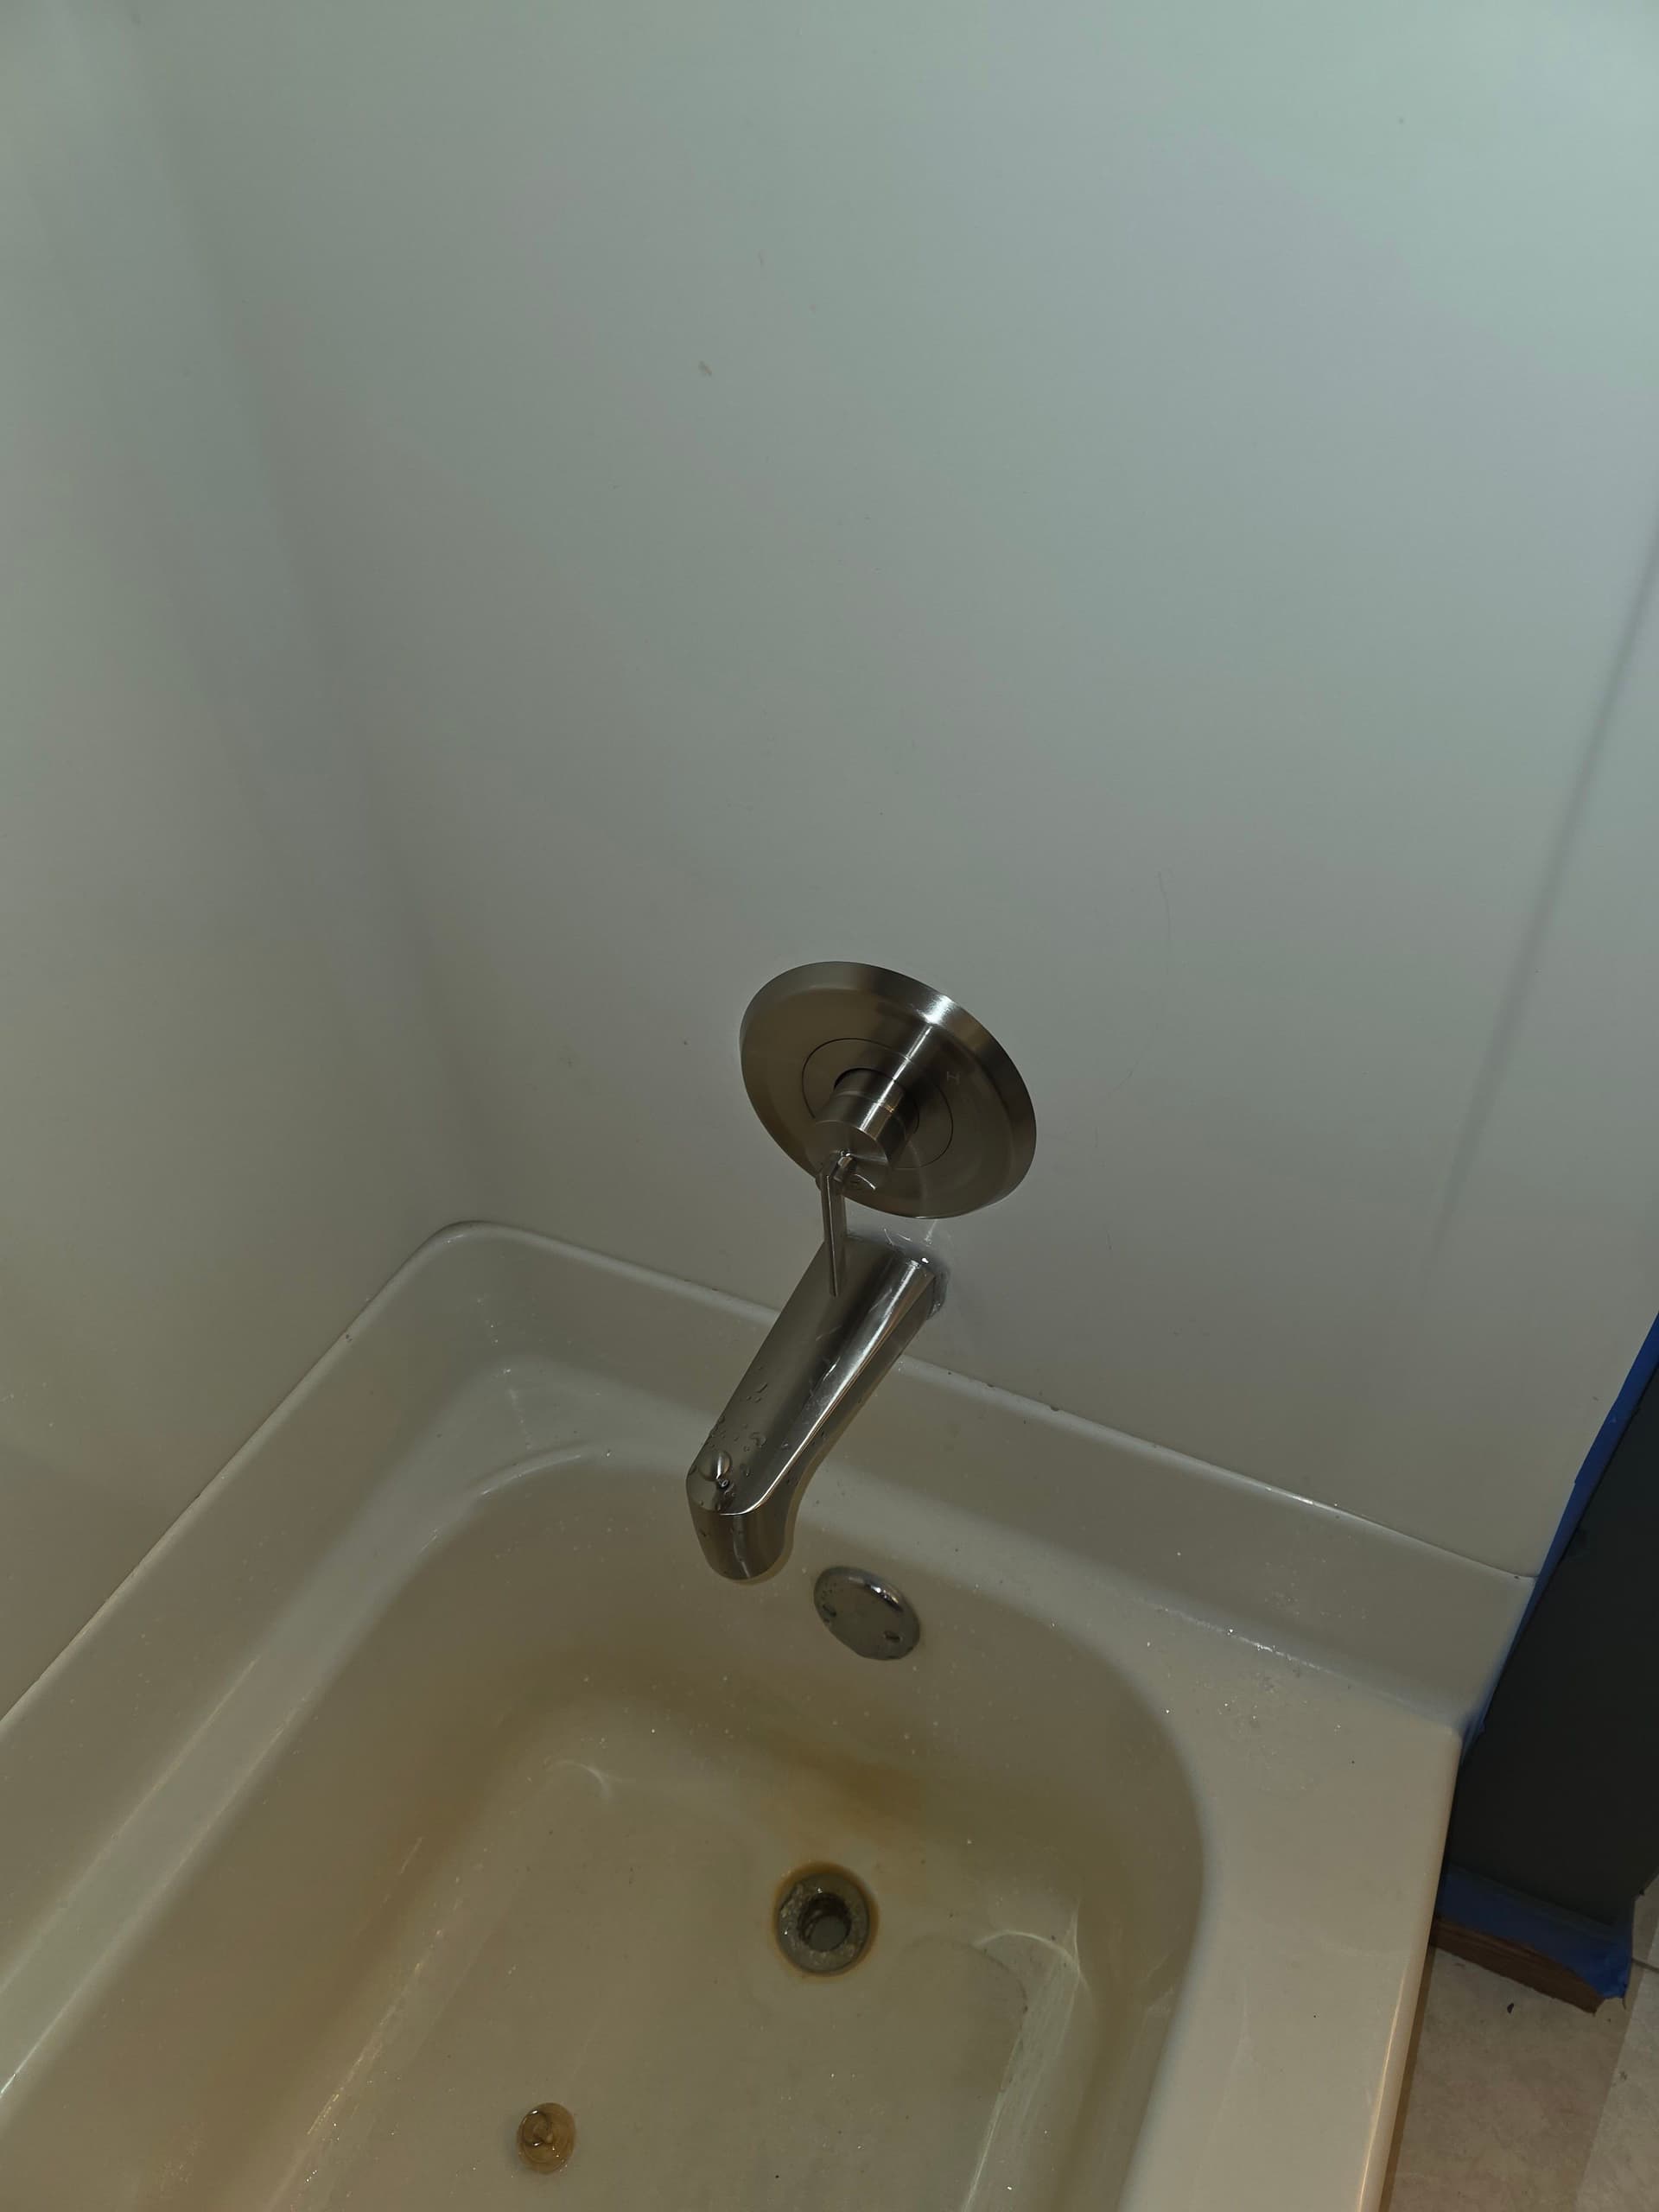
Out front, the trim kit tells the finished story. The new Delta dual shower head setup - a fixed head paired with a handheld on a hose - is seated and ready to go. Clean brushed nickel finish, no slop, no gaps. The tub spout was swapped out too, matching the same finish and sitting flush against the surround. Every piece of visible trim lines up with the work done behind the wall.
This bathroom remodel isn't done yet, but the plumbing is solid and ready for whatever comes next. Getting the behind-the-scenes work right is what makes the finished product actually last. We do this kind of work all the time - shower valve replacements, full plumbing installations, bathtub work - and the approach is always the same. Do it right the first time so nobody has to come back and fix it.